
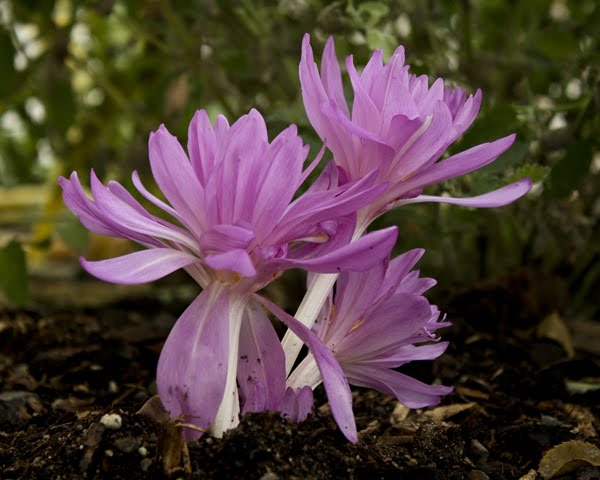
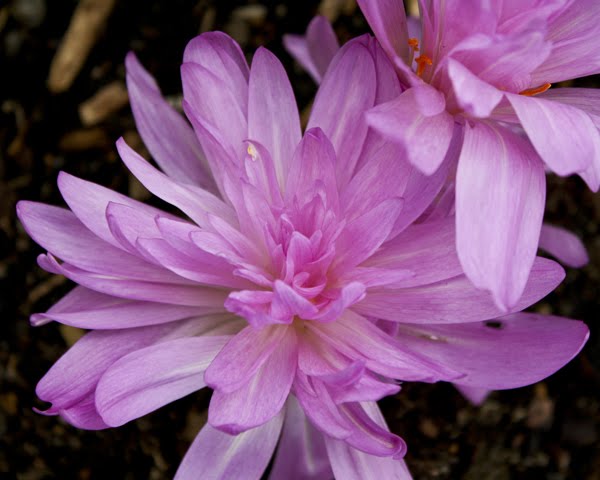
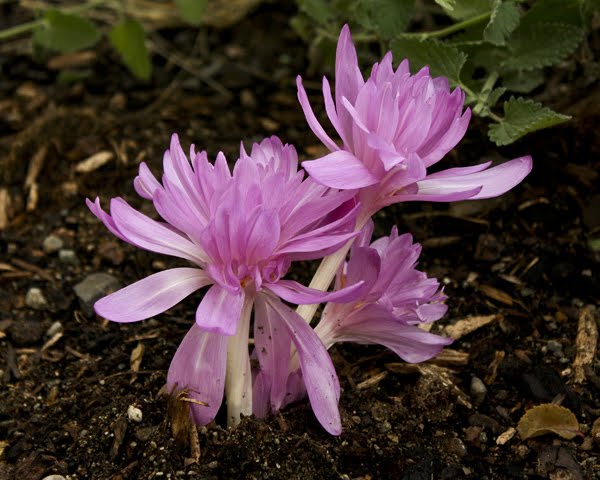
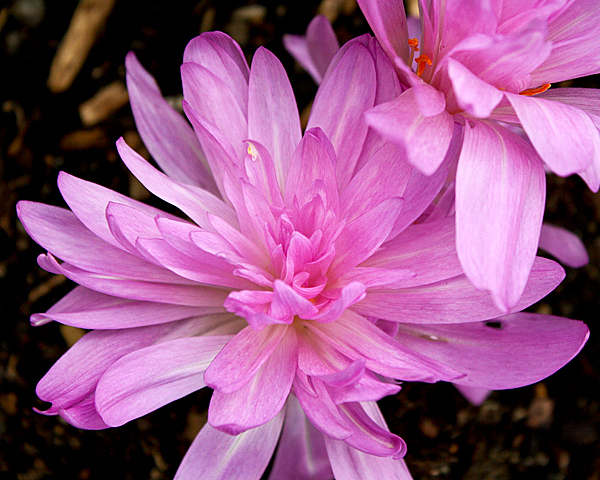
Warning - if you aren't interested in the technical details of improving blog picture quality, then just enjoy the photos of autumn crocus 'Waterlily'. Aren't they pretty? Especially since these are the the ONLY FLOWERS blooming in my yard right now.
Anyway, I have been working to improve my garden photography and I'm considering a lens upgrade for my camera. But none of that would be apparent on my blog if I continued posting pictures in the same manner as before. So I've been searching out options.
I was taking pictures on a high quality setting and then just saving them as smaller files from Photoshop Elements. But when I clicked on the photos to enlarge them from my blog, they opened up into a huge, poor quality image. Enter Scott Kelby's Photoshop Elements 7 book, and I finally figured out how to save higher quality, small files for my blog.
When I was ready to edit these pictures, I opened the files one at a time in Photoshop Element's RAW editor (use the Open As from the drop-down menu and change the file type at the bottom of the pop up screen to RAW, then select the file). I shoot in jpeg, not RAW, but the RAW editor has some cool tools that aren't available in the normal Elements screen. Like the highlight clipping warning and the Recovery slider that reduces the blown-out highlight problem. I love that one. And the Clarity slider, that sharpens my photos in a different way than the normal sharpening, so I can use them both. And the Vibrance slider, and the Masking slider . . .
Anyway, enough gushing about the RAW editor. When I was finished editing in RAW, I clicked the Open File button to open the picture into regular Elements. Then I selected Image - Resize - Image Size from the drop down menu. I made sure the Resample box was checked, then changed the Resolution to 300 and the Width to 600 and clicked OK. Then I chose Save As and made sure the quality slider was all the way to the right side (the highest quality setting). My files ended up between 200 and 400 kb - much smaller than the originals.
Buying Photoshop Elements 7 ($50 at Costco with coupon, $80 normally) and Scott Kelby's Photoshop Elements 7 book (currently $31 at Amazon.com) has made a huge difference in my photos. I also checked out Photoshop Elements 7 for Dummies from my library, which gave me some background on the basics of Elements. If you have some time to learn and don't want to shell out for the 'real' photoshop ($600-700- ouch), I'd recommend this approach. And no one paid me to say that.
If you want bigger pictures, you'll need to widen your blog. See this link to learn how to do that. Then visit Robin from Robin's Nesting Place to find out how she posts larger files from Picasa. A friend of mine uploads to Flickr and then links the photos to her blog. She gets better color that way (my photos all look faded after uploading to Picasa). But I tried that and the pictures kept disappearing after a few days. I'm wishing now that I had started blogging at Wordpress, but I don't want to abandon my old posts and don't have time to repost all of them. So this will be my method for now. What method do you use? Leave your tips and we'll all be grateful!
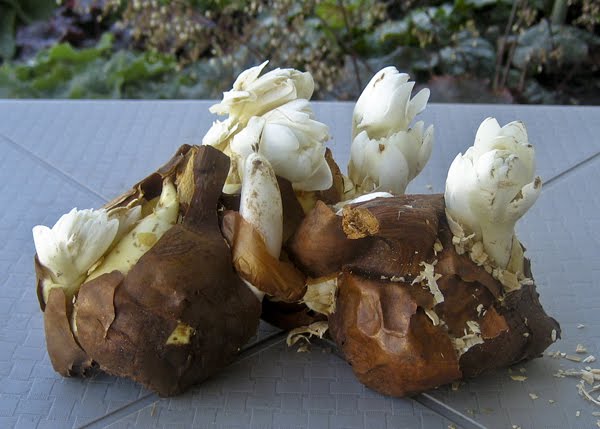
PS - This last photo shows the autumn crocus bulbs from White Flower Farm. They're as big as potatoes, with several flowers sprouting from each one. I'll post pictures of the foliage when it appears in the spring.
Added - I just downloaded the Picasa editor and used it to re-edit this photo. One thing I forgot to mention is that resizing images in Elements does soften the edges; I should have resharpened before uploading them. So I clicked the Sharpen button and the Auto Contrast in Picasa. I tried the Auto Color but didn't like the result, so I cancelled that. The color in this last photo looks like the color in the photo that is saved on my harddrive. You can see the huge difference between this and the first version of this photo, above, that I uploaded without re-editing in Picasa. SO . . . if I'm serious about getting good color in Blogger, I need to edit in both Elements and Picasa before uploading to my blog. Using the Picasa editor preserves the vibrance. Or maybe I'll just switch to Wordpress, since Frances says it's so easy?! I'll have to think about this for a bit.
This is a great post... I am bookmarking it for later when I am more serious about editing with the camera I get later. I am just messing around now and learning from other bloggers. Your photos looked great. I usually do the Picasa method but it is sometimes less then gorgeous results. Thanks!
ReplyDeleteRosey
This was very informative and what difference it can make. This might be something for me to work on this winter when not much is going on outside.
ReplyDeleteHi VW, your shots look absolutely gorgeous! I love the bulbs especially. About wordpress, you can move all of your posts there with the click of one button. I did that with my blogger posts. They remain on the blogspot.com fairegarden, but are also on the wordpress.com fairegarden, comments and all. You don't have to repost them. About the new photoshop program, it sounds great. I use Image Expert 2000, the program that came on our old computer and resize in the same way you mentioned, except can make them a maximum of 760 wide. I do try to make them around 450 to 500 tall to fit most computer screens. I want readers to see the photo and words at the same time. My new Canon has a RAW shooting feature that I have not tried yet. Don't know if it will work with the old photo program that I use. I hate to learn new stuff. :-)
ReplyDeleteFrances
VW, Excellent! The colchicum flowers are stellar... I so need to learn how to better use my iphoto program and then i can move onto what you've suggested! Thanks for the tips. gail
ReplyDeleteGreat photos, VW! You are fortunate to have those pretty purple crocus' blooming right now! I've used several editing tools for my photos, including Picture Pro which came with my Nikon camera; as well as Flick'r and Picassa. I now do all my editing w/Picassa. (I may at some point get a better photo editing program but I'm pretty satisfied with my results in Picassa--being the non-professional that I am!). I experimented with size for quite some time, and after making them HUGE for a while, I've decided that they are going to be 640 x 491 pixels and that's as big as I want them. The link goes to my Picasa web album and it can't be enlarged there, but that's ok with me. This size seems to take up less space. Oh, and I upload them to the web album in the 480 pixel size now, which really saves space on my free picassa account! This is all so much fun, isn't it? Seems we all are doing very similar things;)
ReplyDeleteYou know, Jan's photos always look really vibrant. So maybe editing in Picasa would be the key to finish off my photos. Except Picasa probably doesn't do all the tricks that Photoshop does, so I might have to edit twice? Sigh. There's never enough time for all my blog projects!
ReplyDeletewow, this post has a very different quality of the images than the one before!!! This is my first time in your blog and I just found a gorgeous picture, how great!! It sounds very complicated to do what you are doing with your pictures, I think I will continue with my small pocket camera.
ReplyDeleteYour blog is beautiful!! (excuse my english, please)
cariños
María Cecilia
Hi VW~~ Interesting! Recently I got fell into a combination of dissatisfaction and fearlessness--a deadly duo! Time for a blog makeover. I downloaded Picasa 3.5 to my computer and now I edit all photos in it including a nice watermark. Then I create an album of photos to upload to my online Picasa album. From there I click on the photo, resize, copy, then go to blogger and paste. The photo is large and looks good enough for my taste. I asked for help from a few blogger friends and found resizeit.com for help with the banner photo. Then fine tuned and tweaked to get my system the way I want it. I may tweak some more, who knows? I haven't been concerned about file size but maybe I should be. I don't want to use up my blog's space. I can definitely see a difference between your before and after crocus photos. I've found that lowering the exposure setting on my camera will improve the color quality. But truth be known, I don't have a clue about photography. I need one of those "dummies" books for sure.
ReplyDeleteHi VW, great images, and useful technical advice. I will try the RAW image. Thanks to other commenters as well. I will also bookmark the page, like Rosie. cheers, catmint
ReplyDeleteLike the new look of the blog page VW. Will have to reread this post a few times for all this great info to sink in! (old brain) Glad you have label links on the sidebar as you have posted a couple of great posts on photography.
ReplyDeleteThanks for putting all of this together for us. I am also bookmarking it for when I have a little more time to peruse it.
ReplyDeleteLooking forward to larger photos, Jen
Great post VW. I haven't fooled much with enlarging my photos but I certainly appreciate them when I see them on everyones blogs. I'm so envious of your fall crocus. I planted some last fall but nothing came up. :-( I'm not sure what happened? I kind of want to try again now after seeing your photos.
ReplyDeleteHi VW: When I'm on Picassa, I never use the 'auto contrast' or 'auto color' tools. They usually wash everything out too much. I 'sometimes' use the 'I'm Feeling Lucky' tool in the Basic Fixes, and occassionally, that evens things out. More often, I go to the 2nd category, Tuning, and use some of those features. And sometimes I'll go to the 'Effects' category and use sharpen or another tool. It's all done to please my own eye, and like many of us non-pro-photographers, it's all experimental.
ReplyDeleteHi VW, you asked me to pop by this blog post to share how I upload my photos…
ReplyDeleteWell, I deal with all my photos in Photoshop, I play with them as I see fit by changing the levels and such, then crop and Photoshop has a feature to ‘save for web’ this reduces the size of the file drastically so it looks fine online. Generally I always crop to either 600x600px or 900x600. 600x600 is small enough to put off anyone trying to steal your images for prints as it won’t be good enough quality to create anything larger than 5x5… Anyway, I then upload the images onto photobucket and edit the html of my blog post so they are clickable thumbnails in my posts – these thumbnails are the total size of the image halved, ie 300x300 or 450x300 and so on, this means the images aren’t skewed.
This is my first visit to your blog and your photos are beautiful. I will have to save your post to refer to it later to figure it all out when I have the time. You have a great blog and I enjoyed your post!
ReplyDeletethey look great VaLynn!!! nice work!
ReplyDelete